vigorbuy Tennis Shoe Stability Guide
vigorbuy Tennis Shoe Stability Guide
vigorbuy Tennis Shoe Stability Guide: Choosing by Lateral Movement, Heel Lock, and Court Actions
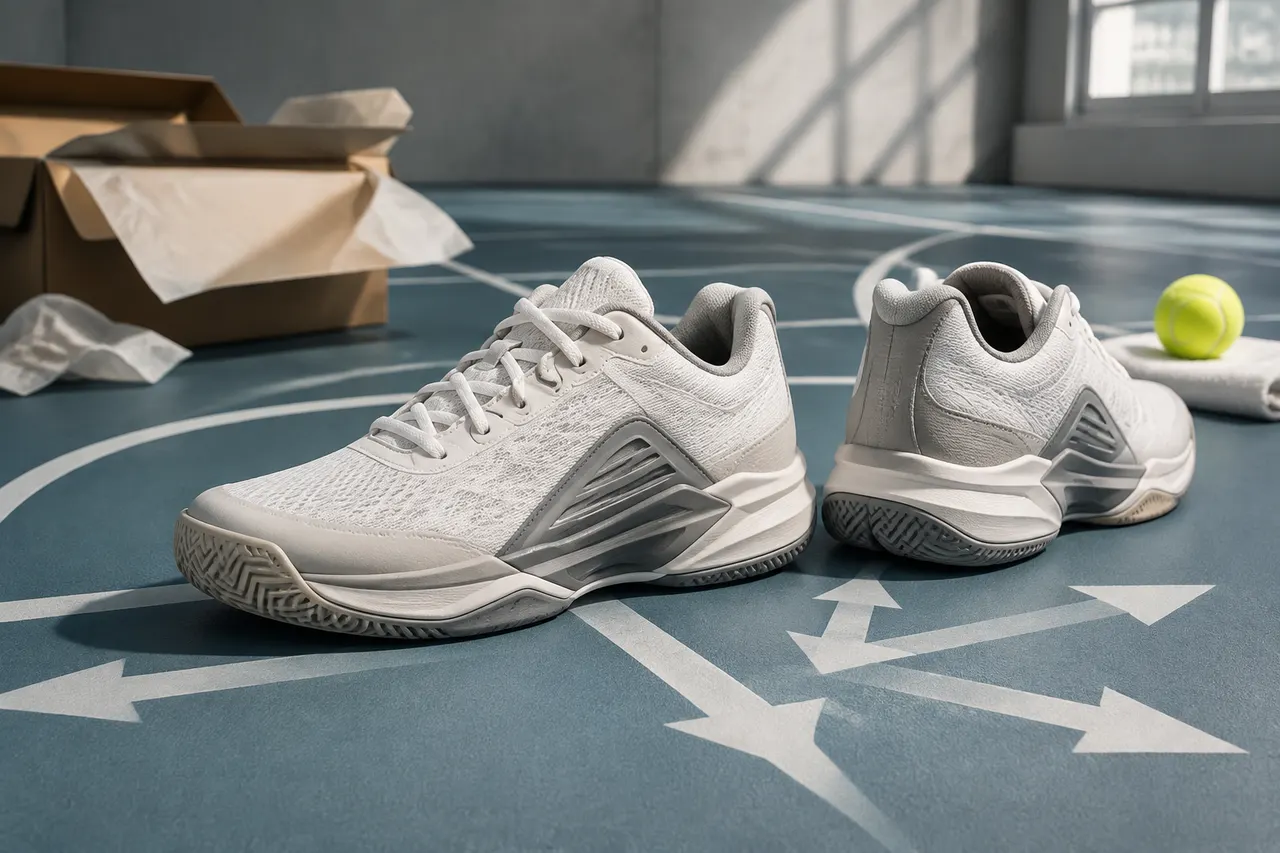
"Stability" in tennis shoes is not about the shoe looking bulky, nor is it about the product title saying support, professional, or match version. The real issue is: when you move laterally to chase a ball, stop abruptly to recover, or perform repeated split-steps, can the outsole platform, heel, and midfoot work together to limit foot slide inside the shoe and reduce the chance of the shoe excessively tilting outward?
This article is for buyers who use vigorbuy-sheets.org to organize candidate products and want to filter out models with insufficient structural evidence before ordering. After reading, you can build a candidate list based on your court actions, record evidence from product pages, and re-check left/right shoes and key structures during warehouse QC.
This article is not suitable for judging cushioning lifespan, slip resistance limits, material strength, or actual match performance of specific shoe models. These properties cannot be confirmed solely from product images. The article also does not make conclusions like "most stable," "professional-grade," or "suitable for everyone" for any product without provided test data.
Verification note: This article was compiled on September 4, 2026, based on the currently provided topic information and image requirements. There were no product samples, prices, inventory, material certifications, seller records, or platform policy documents available for item-by-item verification, so these highly variable pieces of information are marked as pending verification and not cited as current facts. The content was generated by an automated editorial process with fact-boundary checks and does not represent actual purchasing, wearing, or on-court testing experience.
Clarify Movement Tasks in Singles, Doubles, and Training
First write down the movements, then find the shoes. Browsing only under the "tennis shoes" category makes it easy to put models with similar appearances but different usage boundaries into the same comparison group.
Singles typically involves longer lateral coverage, open-stance shots, and braking on the outside foot. The focus should be on whether there is continuous structural evidence for the lateral platform, forefoot sidewall, and heel lock. Those who often run long distances from the baseline should also check whether the connection between the upper and outsole might be a weak point under lateral stress.
Doubles may involve shorter movement distances, but there are more frequent small steps at the net, sudden starts, crossover steps, and quick turns. In this case, midfoot lockdown and heel fit are often more important to check than simply increasing outsole thickness.
Training purposes also need to be broken down: serving practice, fixed-ball drills, and shuttle runs place different demands on shoes. If a shoe is mainly used for continuous lateral shuttle runs, you cannot assume it is also suitable for court stops just because it is comfortable for daily walking. 🎾
Before starting the selection, it is recommended to record four items:
Main activity: singles, doubles, or specific training
High-frequency actions: lateral chasing, stop-and-recover, net footwork, or forward-backward sprints
Court type: hard court, clay, grass, or other surface
Known issues: heel lift, forefoot sliding inside shoe, feeling of outward roll, or midfoot compression
The court type must be confirmed by product information or seller response. Similar-looking outsole patterns do not mean the same grip, durability, or court suitability.
Distinguish Verifiable Information, Visual Judgment, and Unknown Performance
When using vigorbuy-sheets.org, you can treat the candidate entries in the table as discovery starting points. If an entry provides a target product page, you should go back to that page to verify the name, size options, visible images, and update time; the table title or thumbnail alone is not enough to prove inventory, material, authenticity, or performance.
Dividing evidence into three layers can prevent jumping from a promotional image to overly strong conclusions:
Verifiable information: size options, outsole views, heel views, number of eyelets, visible wrapping positions, and dated seller text clearly shown on the page
Visual judgment: the platform seems wide, the heel contour seems deep, there is an upturned structure on the outside. These can only be written as image observations and cannot be directly equated with stability performance
Unknown performance: material hardness, torsional strength, actual grip, wear life, long-term support, and size accuracy. These should remain unknown without measurements or tests
Product names, prices, inventory, colors, sizes, materials, sellers, shipping, taxes, return conditions, and target link status should all be re-verified on the day of ordering. 🔍 Screenshots should also keep the verification date so that the evidence at that time can be traced after the product page updates.
Check Outsole Platform Width and Sidewall Wrapping Structure
Platform width must be judged in relation to the foot position. Looking only at the widest point of the outsole is meaningless because decorative flares may not be exactly under the forefoot load-bearing area.
First find candidate models with both a bottom view of the outsole and a top view of the upper, then check:
Whether the lateral forefoot area has a visible support surface near the ball of the little toe.
Whether the outsole edge extends outward from the midsole, rather than creating a wide appearance only with thin rubber patterns.
Whether the lateral wall turns up in the key forefoot area and connects to the upper.
Whether the medial and lateral outlines are complete, and whether the image creates false width due to angle or perspective.
Whether the heel base is significantly narrower than the shoe body, forming a top-wide, bottom-narrow visual structure.
Without a scale bar, do not give millimeter-level widths. A more reliable method is to request photos of the left and right shoes from the same angle and same shooting distance, and use eyelets, insoles, or known size labels as auxiliary references. Even so, you can only compare relative proportions in the image, not replace physical measurement.
Sidewall wrapping also cannot be judged only by color. What is worth recording is where the wrapping structure appears, how long it covers, and whether it forms a continuous connection with the outsole. Printed lines or different-colored upper overlays cannot automatically be counted as midsole sidewalls.
Verify Heel Counter, Lacing System, and Midfoot Lockdown
Heel stability is determined by last fit, heel counter, collar padding, lacing path, and midfoot volume. A heel that looks thick in images does not mean it won't lift when worn.
When checking the heel, you should look for three angles: directly from the back, from the side-back, and inside the shoe opening. Record whether the heel counter contour is symmetrical left and right, whether the collar is collapsed, whether the lining is smooth, and whether the heel centerline is visibly skewed. If the hardness of the heel counter cannot be confirmed from images, mark it as "unknown" and do not replace evidence with "stiff."
The lacing system requires observing the position of the last pair of eyelets and whether the laces can secure the midfoot backward and downward. Extra eyelets may provide the possibility for heel-lock lacing, but cannot guarantee suitability for all foot shapes. If the midfoot is naturally low-volume or the instep is high, over-tightening may cause compression rather than effectively increasing stability.
When comparing candidate models, you can record:
Whether the last pair of eyelets is complete and identical on both sides
Whether the lacing path crosses the key midfoot area
Whether the tongue has a visible fixation structure
Whether the midfoot overlay is decorative, stitched, or connected to the lacing system
Whether the heel lining shows damage, wrinkles, or visible asymmetry
Judge Stop-and-Go and Lateral Movement Related Design from Product Images
Product images can help eliminate candidates with insufficient evidence, but cannot simulate actual stop-and-go. The correct question is not "Can this shoe prevent ankle rolling?" but "Are there structures related to lateral stress that can be re-confirmed during QC?"
Continuous wrapping on the lateral forefoot, platform flare under the load-bearing area, midfoot connection structures, and a relatively centered heel base can all be recorded. 📐 However, the following situations should lower the evidence level:
Only oblique side promotional images, no outsole and direct back views
Outsole obscured by shadows, packaging, or post-production effects
Left and right shoes not shown together in the same set of physical photos
Structural details only present in renderings and cannot be matched in physical photos
Image resolution insufficient to distinguish seams, printed lines, and physical wrapping
Outsole patterns in images can be used to confirm pattern direction and coverage area, but cannot alone prove friction coefficient. Darker color, denser pattern, or thicker-looking rubber does not prove stronger grip or longer lifespan.
Compare Candidate Tennis Shoes with a Stability Evidence Checklist
It is recommended to compare only three to five candidate shoes and require every conclusion to be traceable to a specific image or text record. A "pass" in the table means the evidence is sufficient to advance to the next round, not that performance has been verified.
Check Item | Acceptable Evidence | Should Mark Unknown or Eliminate |
|---|---|---|
Forefoot platform | Top view and outsole bottom view correspond to load-bearing area | Only oblique photos, cannot exclude perspective influence |
Lateral wrapping | Wrapping position continuous and visibly connected to outsole or upper | Only color lines or renderings |
Heel structure | Back view and collar view allow checking contour and symmetry | Heel obscured, or left/right difference cannot be judged |
Midfoot lockdown | Lacing path, overlays, and connection positions clear | Only "support" promotional words, no structure images |
Court suitability | Product page or seller provides traceable description | Only guessing hard court or clay use from pattern |
Size basis | Has in-shoe label, insole length, or clear size data | Only direct conversion from daily shoe size |
You can set a simple status for each item: confirmed, visual observation only, unknown, abnormal present. Do not summarize four "visual observation only" items as "high stability." A more reasonable choice is to prioritize candidates with complete key views, fewer unknown items, and clear return/exchange boundaries.
Re-check Left/Right Shoes and Structural Details via QC Images After Ordering
The warehouse QC task is not to re-appreciate the appearance, but to confirm whether the received physical item matches the candidate evidence recorded at the time of ordering. 📦 If the platform or warehouse allows supplementary photographs, you should try to request them before the return/exchange processing window closes, and first verify the current rules for photography, returns/exchanges, and fees.
Basic QC should include at least:
Top view of left and right shoes together, for comparing shoe shape, eyelets, and upper structure
Direct back view of left and right shoes together, for checking heel centerline, height, and symmetry
Complete outsole view of both shoes, for checking pattern, bonding edges, and obvious deformation
Close-up of the lateral side, for re-checking forefoot sidewall and wrapping area
Size labels of both shoes, and insole length photos taken with a uniform tool
After receiving images, first check the ordered product, color, and nominal size, then look at structure. If there are obvious differences in heel contour, outsole edge, wrapping position, or eyelets between left and right shoes, save the original images and ask within the allowed processing period. Do not judge minor glue separation from compressed thumbnails, and do not treat normal shooting angle differences as structural defects.
When dealing with dimensions, require the ruler start point, end point, and scale to be visible simultaneously. If the insole is bent, the ruler is floating, or the photo does not capture the zero mark, that measurement can only be used as a low-confidence reference.
Combine Size, Returns, and Usage Boundaries for the Final Choice
Stability structures are only meaningful when the size fits. A shoe that is too long increases foot slide inside the shoe, while a shoe that is too narrow may cause forefoot compression; neither problem can be solved by infinitely tightening the laces.
Before making the final decision, combine foot length, foot width, thickness of commonly worn sports socks, and verifiable in-shoe data. If a size chart does not specify measurement method, units, or corresponding in-shoe length, it cannot be directly used as a precise conversion basis. There may be differences between sellers, batches, and lasts, so the current product page and current QC information should prevail.
Return and exchange conditions are also part of the choice. Confirm the processing window, acceptable reasons, possible warehouse handling fees or return shipping costs, and keep product page and QC records. This article has not received information about current transaction, warehousing, logistics, or after-sales policies of vigorbuy-sheets.org, so it does not provide fixed time limits or fee numbers; you must verify on the actual service page before ordering.
Finally, you can make decisions in the following order:
Eliminate models lacking evidence of outsole, heel, or left/right shoes.
Eliminate models whose size basis cannot be verified and whose return/exchange cost is unacceptable.
Among the remaining candidates, choose the pair that best matches the main movement tasks, has key structures that can be re-checked, and has the fewest unknowns.
After arrival at the warehouse, check against the same list; if key inconsistencies arise, handle them first and do not rush to submit for shipping.
✅ This method does not promise a fixed amount of savings. Quantifiable potential savings should be calculated per order based on "return/exchange fees, repurchase price differences, extra warehousing fees, and non-refundable losses due to wrong size or structural abnormalities," and use the verified fees on that day. The added cost is the time needed for screening and supplementary QC, and may also include extra photography or return fees; the main risk is mistaking static images for tested performance.
This method is suitable for buyers who have more lateral movement, are prone to heel lift, or want to reduce obvious structural and size errors before warehouse shipment. It is not recommended for remotely judging actual grip, torsional stiffness, cushioning lifespan, material quality, or match safety; if candidate products lack key views, size basis, and enforceable return conditions, you should not order based solely on appearance.
Browse our latest products and find your next favorite item.